04
Build Your Own Robot the Lunar Industries Way
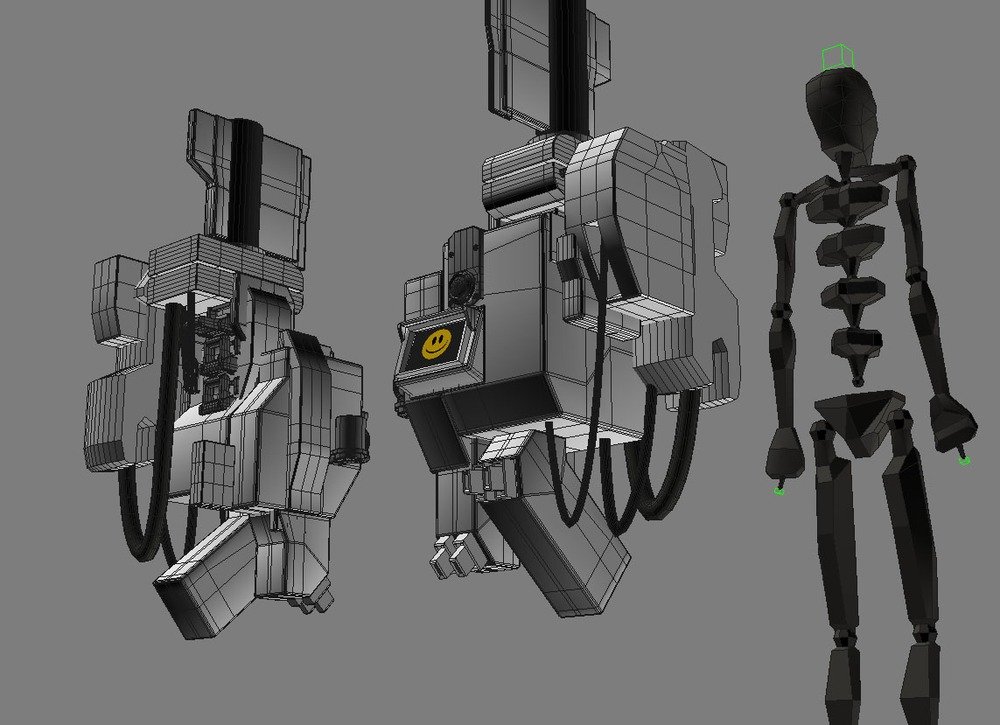
I was having a bit of a dig around on a couple of my old hard drives recently and I came across this set of images and thought they might be of interest. They're the actual images that I gave to Bill Pearson to enable his team to start the build of our ever-faithful robot Gerty, so they are the actual blueprints. I left these images with an overlaid wireframe to assist with the proportioning and as you can see, the robot came out pretty faithful to my original plans. At the same time I was working up paint schemes and things but I passed these on later as we really needed to get the model build underway and I was juggling so much work it was more like putting out fires.


In the image below you can see Gerty approaching the end of construction with the blueprint laid out behind on the wall. The green blocks on the lower right hand side of the image are the foam blocks that would be carved and used to pad out areas underneath the hot plastic when vacuum-forming. The Vac-Form machine is down in the lower right hand corner of the image and sort of looks like a dangerous old gas oven. Gerty was made of sheets of plastic glued together into boxes and then re-glued together into our stage prop so essentially he's flat-pack. Bill and his team did such an amazing job for us on Moon that it's quite humbling thinking that we got to hire these guys to make our robots and little space-cars. They were always really interesting chaps to talk to and I got such a massive kick out of seeing these skilled craftsmen bringing my CG designs into the real world it's hard to describe.
If you look just to the bottom of the blueprint Gerty stuck on the wall, you can see a vicious red reflection in there. This one of the electric bar heaters that kept the model shop warm and used to make me think I was about to burst into flames whenever I had my back to it.

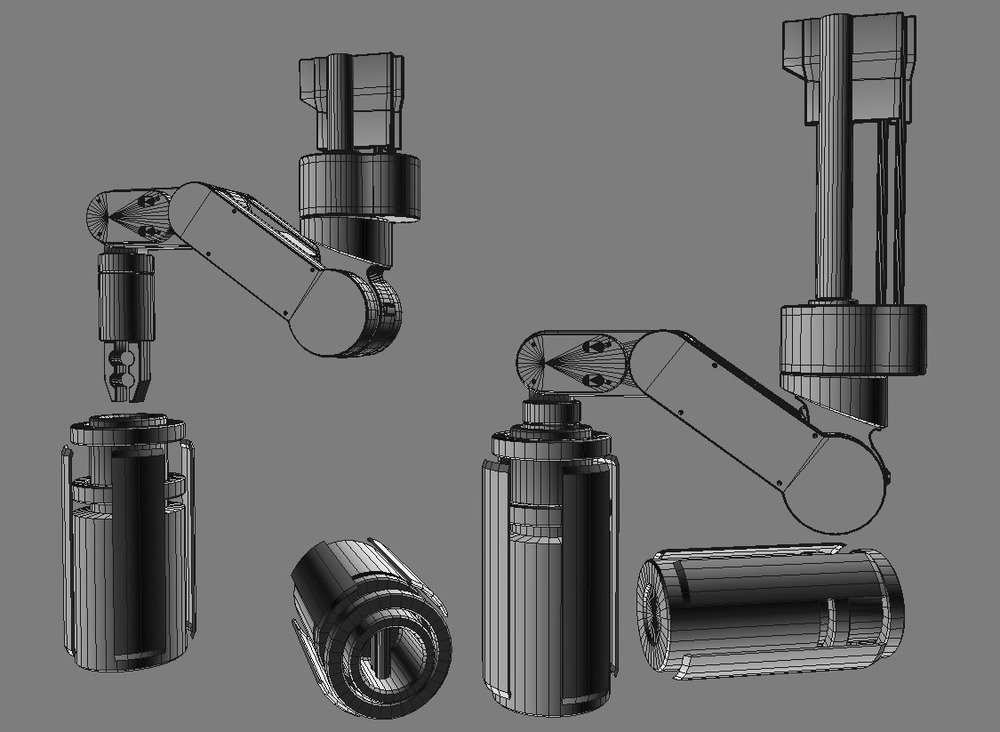
As well as these orthographic views I also did a couple of perspective renders so the modelling team could get a sense of the overall mass and shape. I was actually quite surprised at how low-tech the model shop was at first as everything was manual. Bill did have an old PC but he hardly ever even checked his email (I think he did it about once a week or so), and none of the model team used computers in any capacity with the model build.
About the most sophisticated bit of technology they had in there (apart from the hypnotic vac-forming machine) was a portable DVD player with a 7-inch screen that could usually be found to contain a DVD of Snow White and the Seven Sexy Dwarves. As we were all based on the Shepperton Studio lot it was a simple matter for me to just pop over and hang out for a bit catching up on what was going on and breathing in a lot of airborne solvents so not being connected by email wasn't a problem and in a sense was perhaps better as it brought us together in the same room much more often than we would have been otherwise.


I also did some renders of the arms, but the heavy lifting arm was the main part of the model that had specific requirements in the script. It had to be able to load the HE3 canisters into the cargo lift that transferred them to the return pods. We went back and forth a bit on this as Bills' team built the arm and cylinders simultaneously. I'd originally envisaged the cylinders to be something like an oil drum but we had to scale them down quite a bit to get them built so they fitted into the set. In the end we don't get to see too much of this action as we ran out of money and so just left it at the opening scene where Sam bangs his arm. The Gerty arm was hollow and had very little mass so Sam wasn't in any actual danger of having any bones crushed. I'm pretty sure that nobody will have noticed this but the rover wheels have the same lifting bar on the inside as the large HE3 canisters. This is because the arms can actually move outside the station into the lunar vacuum and are used to repair and service the rovers in the garage. The heavy-lifting arm is the arm that changes the rover wheels. If you spotted that you might have to win a prize.


In the image below you can see Bill Pearson talking Duncan through the operation of the seven-inch digital photo-frame that was Gertie’s face. I had a series of SD cards with all the face graphics loaded up and had them in my pocket when we were shooting. As we moved on to the next scene, I'd grab the correct Gerty "face" from my pocket and load it into the monitor.

In the end, these screens weren't bright enough and so I made up some transparencies and we fitted a brighter light inside Gerty so it would read better on film. This still didn't crack it 100% and in the end we replaced them all digitally in post. And that's how Gerty, the Ikea flat-pack robot was made out of a few pixels, some electricity and loads of plastic and glue. If you decide to take these plans and build one yourself be sure to send me a photo.